 |
Bulletins |
|
Home |
About Us |
53nd Meet |
Membership |
State Divisions |
Commander's Message |
Antique Photos |
New Photos |
Videos |
Officers |
Bulletins |
Magazines |
Journeys |
Memorabilia |
Bicycle Brands |
Message Board |
Swap Meets |
Events |
Links |
Faq
|
|

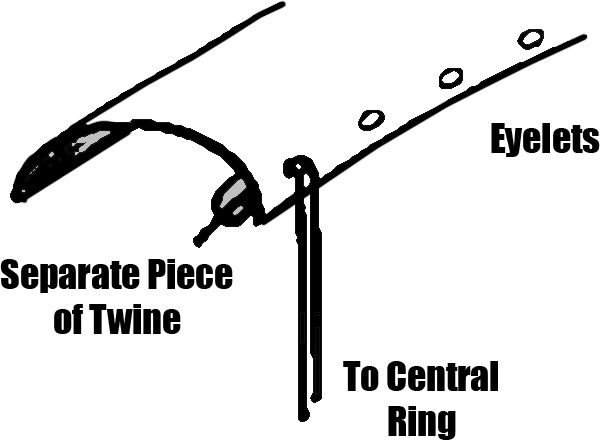
Fancy Ladies Skirt Guard - Method for AttachingBulletin #: 22 A general provision for ladies bikes in the early safety period was the use of a twine or string cover over a portion of the rear wheel as a skirt guard. Such twine covers were also supplied as chain guards on both men’s and ladies’ bikes. The color of the twine varied from light beige on some bikes to deep black on others, and covered the entire intermediate range. Generally the lighter colors show up to greater advantage for display purposes and even bright colors such as red and orange have been used. Such twines are available from stores selling arts and crafts supplies for macrame and weaving. The proper type is referred to as navy twine and is of the correct texture and weight to correspond with the material used in the 1800s. The most simple skirt guard is simply an up and down pattern from the eyelets in the fender or mud-guard back to the loop affixed to the bike frame somewhere near the rear hub. This simple pattern works well, and was used frequently on the old bikes. For a little more glamour, another pattern has been used. This is one that appears to be quite complex to install, but using a few simple tricks can be done quite readily.
If this is done properly, the linen thread knots will not be discernible, and the twine will appear to cross at these points. Repeat the whole procedure on the other side of the fender. |


©2001-2019 The Wheelmen | All Rights Reserved | Disclaimer | Last site update 2019-11-17
For questions about this website, please contact The Webmaster